Import trading relationships from a spreadsheet
The Xure import wizard allows you to quickly record multiple trading relationships using a list of your suppliers or an export from your own supplier management or database system.
The wizard will use business identifiers contained in your file to match against businesses we know about. You will have a chance to review each of the proposed matches before confirming the trading relationships.
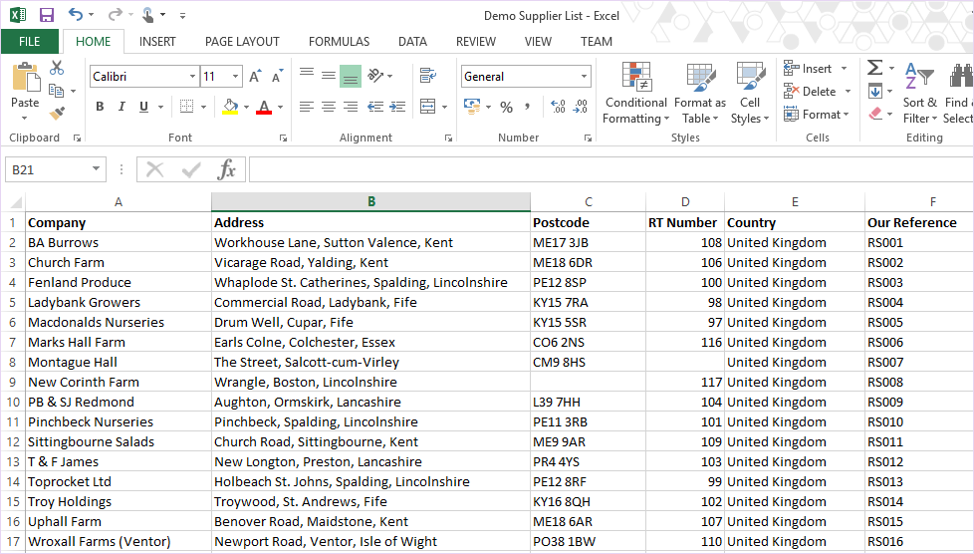
1. Before you start, prepare a spreadsheet of suppliers you wish to set up trading relationship with. Both Excel (.xls, .xlsx) and comma separated value (.csv) files are supported.
- Remember to include as many accurate business identifiers as possible to maximise the chances of a match being found in our database.
- If you know that all the suppliers listed in your spreadsheet are members of a scheme, make sure to include their scheme number, postcode and/or holding number.
- If not, you may use the companies' registration number, VAT No, Global Location Number (GLN) or Holding Number.
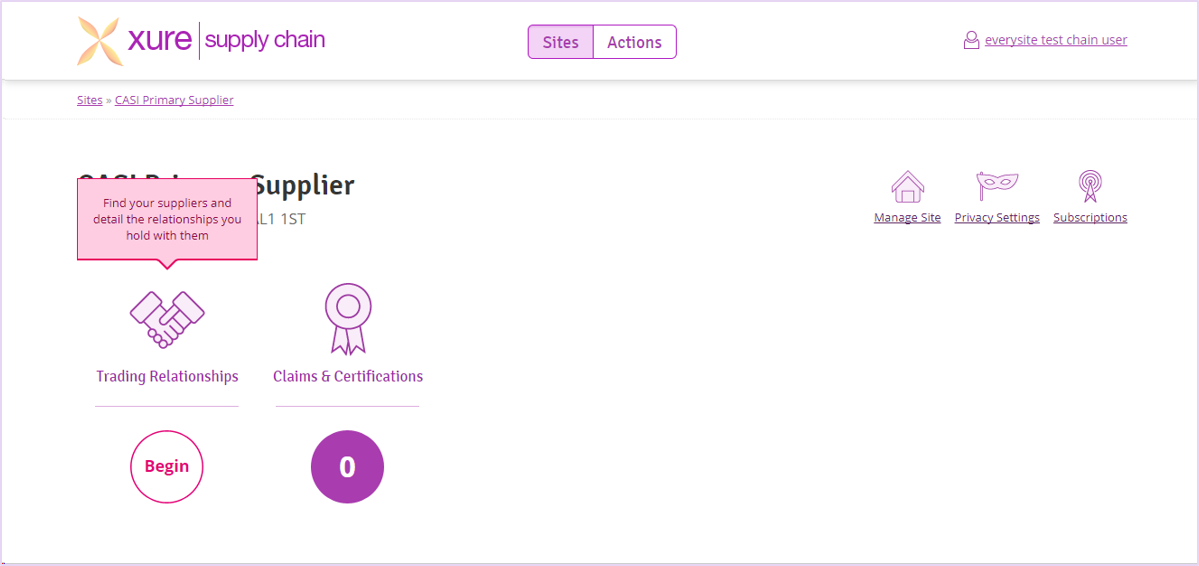
2. Once your suppliers is ready to be imported, navigate to the Trading Relationships page and click ‘Import supplier relationships’.
3. Click ‘Choose file’ and select the spreadsheet containing the list of suppliers.
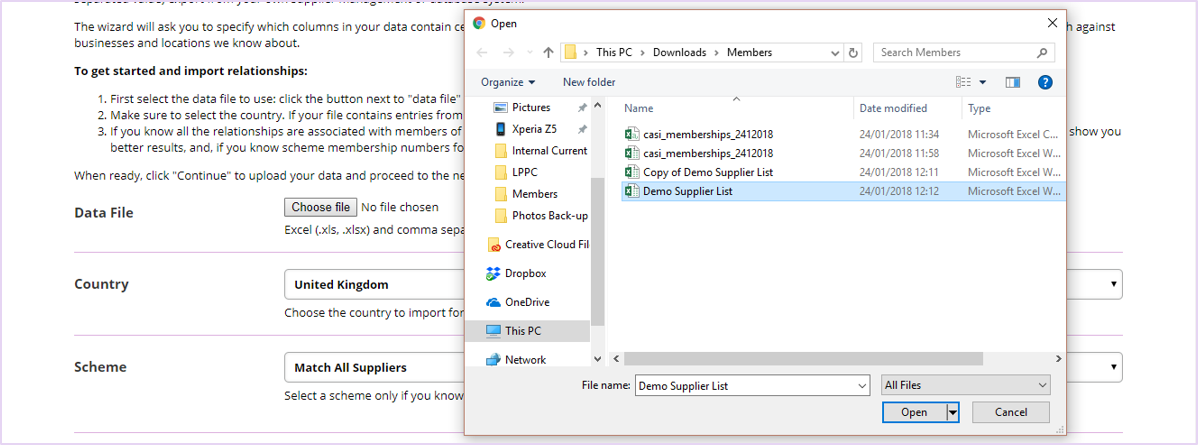
4. If the spreadsheet contains assurance scheme numbers as identifiers, select the relevant assurance scheme from the drop-down and click ‘Continue’.
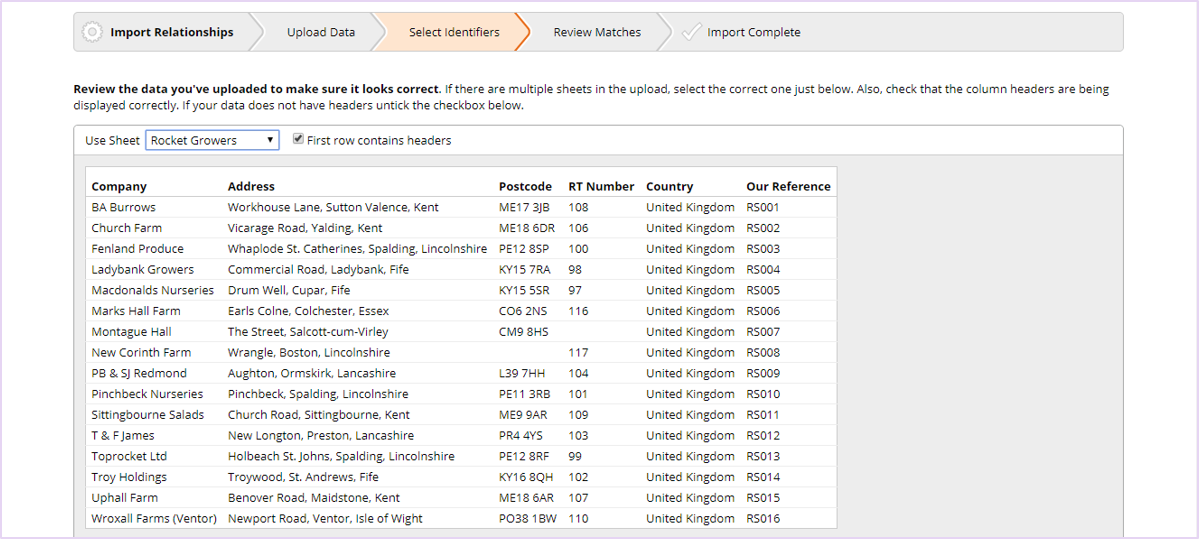
6. Next, review the data you've uploaded to make sure it looks correct.
- If there is more than one sheet in the file, select the sheet containing the supplier list from the drop-down.
- If the first row contains headers, ensure the box is ticked.
6. Scroll down to select which identifiers you would like the wizard to use to match the data.
7. Using the drop-down menu, select the column name which corresponds to each of the identifiers you want to point the wizard to.
- To record a supplier reference against the trading relationship, select the appropriate column for ‘Your Reference’. Click ‘Continue’.
8. The wizard will display a table of results, as below. The first column on the left on a grey background indicates the action taken by the wizard. The other columns display the data you imported.
- Please take some time to review ALL actions carefully before continuing to avoid setting up incorrect trading relationships. You may see a combination of the following actions:
- Matched: the wizard found a match against the data you supplied. You may click on "Edit" to view the business details recorded in our database.
- Not Matched: we were not able to match your data against a known business.
- Please Verify: multiple sites match the identifiers supplied.
8. Where multiple sites have been matched during the import (action states "Please Verify"), click on Edit to view the proposed matches. Select the correct supplier to tag, if displayed. If none of the proposed matches are correct, click ‘Skip Match’.
9. Where an incorrect site has been matched, click ‘Skip Match’ to prevent an incorrect relationship being recorded. The site will then be listed as ‘Not Matched’ in the import review.
10. When all matches have been reviewed, click ‘Confirm’ to tag the selected matches.
- When the import is complete, tagging results are displayed:
- Tagged – supplier has been tagged.
- Tag exists – there is an existing trading relationship with the supplier.
11. All the newly tagged members now show on the Trading Relationships page including any saved supplier references.